
In this Newsletter: When to transplant tomato seedlings, about John Innes compost, nutrients for tomatoes and feeding seedlings.
My last seeds have been sown and I’m now the proud, father-like figure, of my lovely new seedlings – they do get pampered!
When to transplant tomato seedlings
Some gardeners like to transplant their seedlings within a few days of germination – I prefer to leave them for around 3 weeks in
the seed tray (or other germination container) before disturbing them.
It doesn’t matter much either way, but leaving them for a bit longer allows the seed compost to dry out more, making transplanting easier and roots less likely to break.
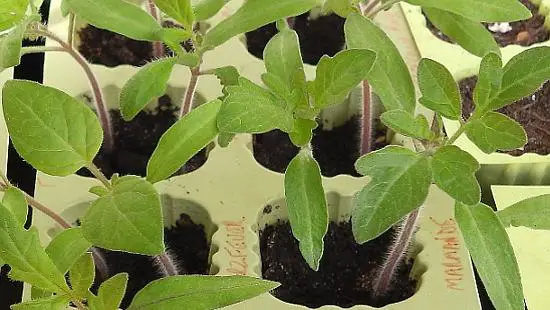
I can also control leggy seedling better by transplanting them down to their seed leaves at three weeks rather than one.
If seedlings are competing for light (sown too close together), it’s best to transplant earlier rather than later to give them more space.
As we consider when to transplant tomato seedlings the pricking out period (some of us may have done that already), we may be considering which potting compost to use.
Here’s what makes John Innes mix such a good choice – or multi-purpose with added John Innes.
John Innes compost
A type not a brand, is high quality and specially formulated for the different stages of a plant’s development and growth.
It comes in the following mixes:
- Seed Compost is for sowing seeds
- No 1 Potting Compost is for pricking out young plants
- No 2 Potting Compost is for potting on
- No 3 Potting Compost is for established plants
The above is a guide – I’ve used No 2 for final position planting with great results.
Loam/Soil
Loam is the major ingredient in the compost as it provides the main “body” of the compost.
It is composed of silt, clay, and organic matter in evenly mixed particles of various sizes.
More fertile than sandy soils, loam is not stiff and difficult to dig like clay soils – though it does contain some clay.
Clay
Although we traditionally think of clay as a problem rather than an asset, a small amount of clay in our soil is good.
It absorbs both moisture and nutrients – tomatoes grown in soil with a small amount of clay, are less likely to be affected by Blossom End Rot.
Because loam/soil is porous, it allows high moisture retention from the silt and clay and air circulation from the sand, peat and organic matter.
Loam also contains essential micro-elements and the organic matter provides a slow release of nitrogen to the plants.
Peat
Sphagnum moss peat increases the total porosity and improves both the aeration and the water-retaining capacity. Peat decomposes slowly into humus.
Alternatives to peat
The use of peat is an issue from a conservation point of view, so alternatives are often used – such as coir (coconut shell), perlite and vermiculite for example.
Sand
The coarse sand or grit is used as a physical conditioner to allow excess water to drain from the compost and thus prevents water-logging. It also helps to provide stability for plants in containers.
Added Nutrients
The compound fertiliser in John Innes Compost provides a wide spectrum of plant nutrients needed for balanced growth, including:
- Nitrogen – for top growth
- Phosphorus – for root growth
- Potassium/Potash – for flowering and fruiting
- Trace Elements – for vigorous growth, colour and flavour
The fertiliser is usually sufficient for around five weeks of growing, after which time additional feed should be given, but it also depends on the size of the container and the amount of compost used.
Multi-purpose compost can consist of any of the above ingredients so it is “pot luck” (sorry about that!) what you get in the bag although the contents are sometimes displayed on the bag.
Good quality multi-purpose should have roughly the same nutrient balance as John Innes.
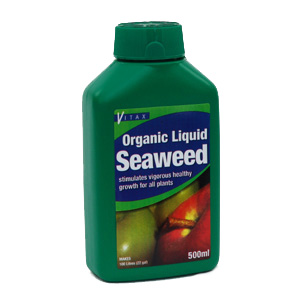
Feeding seedlings
As we all know, it’s best not to feed seedlings, although a tonic such as liquid seaweed extract is great for encouraging soil microbes and general health.
Tomato food
The nutrient balance of tomato food is such that it may be thought of as a “finishing potion” – a mix that brings our fruiting plants to maturity.
A regular, smaller dose of a balanced feed, that also encourages healthy bacterial activity, is much more beneficial.
More on this when we approach the end of May and final position planting.
Hydroponics 4 Fun
If you would like to join me in an experiment to grow a tall variety using basic hydroponic methods, you will need:
- One seedling or small plant
- Perlite or vermiculite or coir (coconut shell) or rockwool. If you want to follow along using soil that’s OK too!
- An empty plastic milk container
- A bucket (without a hole in it:)
The nutrients we’ll be using are: Rootit First Feed (optional), An inexpensive liquid balanced feed (such as Wilco’s) and a tomato feed towards the end.
It’s good fun and there is always something new to learn – or something to remember to avoid next season!!!
I hope your seedlings are doing well!
Regards,
Nick
Diana Winfield
What is your opinion about transplanting tomato seedlings ( when big enough) from seed trays to fibre pots that can be planted in larger pots or outdoors later . Are these pots biodegradable in soil as claimed ?
Nick
Hi Diana,
I tried the fibre pots a number of seasons ago and I didn’t like them. Although the fibre will break down, it doesn’t biodegrade quickly enough for the rapid growth of tomato roots. I think it best to stay with ordinary pots.
Rhys
Nick
I made my own leaf mould the past 18 months and after successful germination of early carrots in February (in plastic polypot bags), I am currently germinating tomatoes in a surface layer of leaf mould atop JI seed compost. I ahould know by next week’s newsletter whether it works well or not. All I did was collect leaves in autumn 2016 from where they had been swept up and left them out exposed to the elements in 35 litre pots to rot down, combining pots as the process occured (you end with about one tenth volume of your starting material). A painless freebie!
One thing I have also noticed is that the spare seedlings I kept as insurance against transplant failure were larger at day 23 than my transplanted seedlings were. Whether they would be caught up if now transplanted I do not know as my transplants are doing well so the spares will be discarded.
Nick
Hi Rhys,
I look forward to the results of your leaf mold experiment.
It maybe because the transplanted seedlings are developing a good root system in deeper soil.
Rhys Jaggar
Leaf mould is working really well: everything coming through now. I will take photos in a couple of days when all are through.
Anonymous
Thanks Nick
Alan
Glad to have you back looking forward to the rest of my emails like to try something different as I don’t have a lot of room
Nick
Try growing hydroponically – saves a lot of space!